2. Installation
BEDOPS is available to users as pre-built binaries and source code.
2.1. Via pre-built packages
Pre-built binaries offer the easiest and fastest installation option for users of BEDOPS. At this time, we offer binaries for 32- and 64-bit versions of Linux and OS X (Intel) platforms.
2.1.1. Linux
Download the current 32- or 64-bit package for Linux from Github BEDOPS Releases.
Extract the package to a location of your choice. In the case of 32-bit Linux:
$ tar jxvf bedops_linux_i386-vx.y.z.tar.bz2
In the case of 64-bit Linux:
$ tar jxvf bedops_linux_x86_64-vx.y.z.tar.bz2
Replace
x,yandzwith the version number of BEDOPS you have downloaded.Copy the extracted binaries to a location of your choice which is in your environment’s
PATH, e.g.~/opt/bin:$ cp bin/* ~/opt/bin
Change this destination folder, as needed.
2.1.2. Mac OS X
- Download the current Mac OS X package for BEDOPS from Github BEDOPS Releases.
- Locate the installer package (usually located in
~/Downloads– this will depend on your web browser configuration):
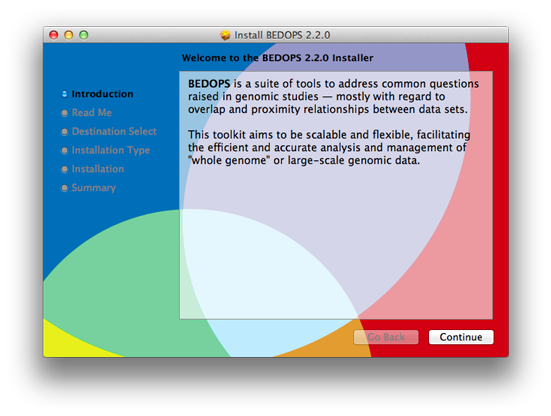
- Double-click to open the installer package. It will look something like this:

- Follow the instructions to install BEDOPS and library dependencies to your Mac. (If you are upgrading from a previous version, components will be overwritten or removed, as needed.)
2.2. Via source code
At this time, compilation of BEDOPS requires GCC 4.7 or greater (which includes support for C++11 features required by core BEDOPS tools).
If you do not have GCC 4.7 or greater installed, first do so. You can check this with
gcc --version, e.g.:$ gcc --version gcc (MacPorts gcc47 4.7.3_3+universal) 4.7.3 ...
For Mac OS X users, we recommend first installing Apple Xcode and its Command Line Tools, via the
Preferences > Downloadsoption within Xcode. Then install GCC 4.7 or greater using MacPorts, setting GCC to be the default compiler, e.g.:$ sudo port install gcc47 $ sudo port install gcc_select $ sudo port select --set gcc gcc47
In the future, we may provide support for OS X compilation via Clang/LLVM, which is the default compiler included with Xcode.
For Linux users, use your favorite package manager to install the requisite compiler. For example, in Ubuntu, you might run the following:
$ sudo apt-get install gcc
Install a
gitclient of your choice, if you do not already have one installed. Github offers an installation guide.Clone the BEDOPS Git repository in an appropriate local directory:
$ git clone https://github.com/bedops/bedops.git
(Linux) Run
make staticin the top-level of the local copy of the BEDOPS repository:$ cd bedops $ make static
(Mac OS X) Run
make build_all_darwin_intel_fatin the top-level of the local copy of the BEDOPS repository:$ cd bedops $ make build_all_darwin_intel_fat
Install compiled binaries and scripts to a local
binfolder:$ make install
Copy the extracted binaries to a location of your choice that is in your environment’s
PATH, e.g.~/opt/bin:$ cp bin/* ~/opt/bin
Change this destination folder, as needed.
2.3. Building an OS X installer package for redistribution
Follow steps 1-3 and step 5 from the Via Source Code documentation.
Run
make install_osx_packaging_binsin the top-level of the local copy of the BEDOPS repository:$ make install_osx_packaging_bins
Install WhiteBox Packages.app, an application for building OS X installers, if not already installed.
Create a
builddirectory to store the installer and open theBEDOPS.pkgprojfile in the top-level of the local copy of the BEDOPS repository, in order to open the BEDOPS installer project, e.g.:$ mkdir packaging/os_x/build && open packaging/os_x/BEDOPS.pkgproj
This will open up the installer project with the
Packages.appapplication.Within
Packages.app, modify the project to include the current project version number or other desired changes, as applicable.Run the
Build > Buildmenu selection to construct the installer package, located in thepackaging/os_x/buildsubdirectory. Move this installer to the desired location withmvor the OS X Finder.
