Qt Creator
The Qt Creator is an open source cross-platform integrated development environment. The editor includes such features as syntax highlighting for various languages, project manager, integrated version control systems, rapid code navigation tools and code autocompletion.
Refer to the Qt-creator Manual page for more detailed information.
Integration
Integration process consists of these steps:
Open system Terminal and install PlatformIO Core (CLI)
Create new folder for your project and change directory (
cd) to itGenerate a project using PIO Core Project Generator (
platformio init --ide)Import project in IDE.
Project Generator
Choose board ID using platformio boards or Embedded Boards Explorer
command and generate project via platformio init --ide command:
platformio init --ide qtcreator --board <ID>

# For example, generate project for Arduino UNO
platformio init --ide qtcreator --board uno
Then:
Import project via
File > Open File or Projectand selectplatformio.profrom the folder where is located “platformio.ini” (Project Configuration File)Select default desktop kit and click on
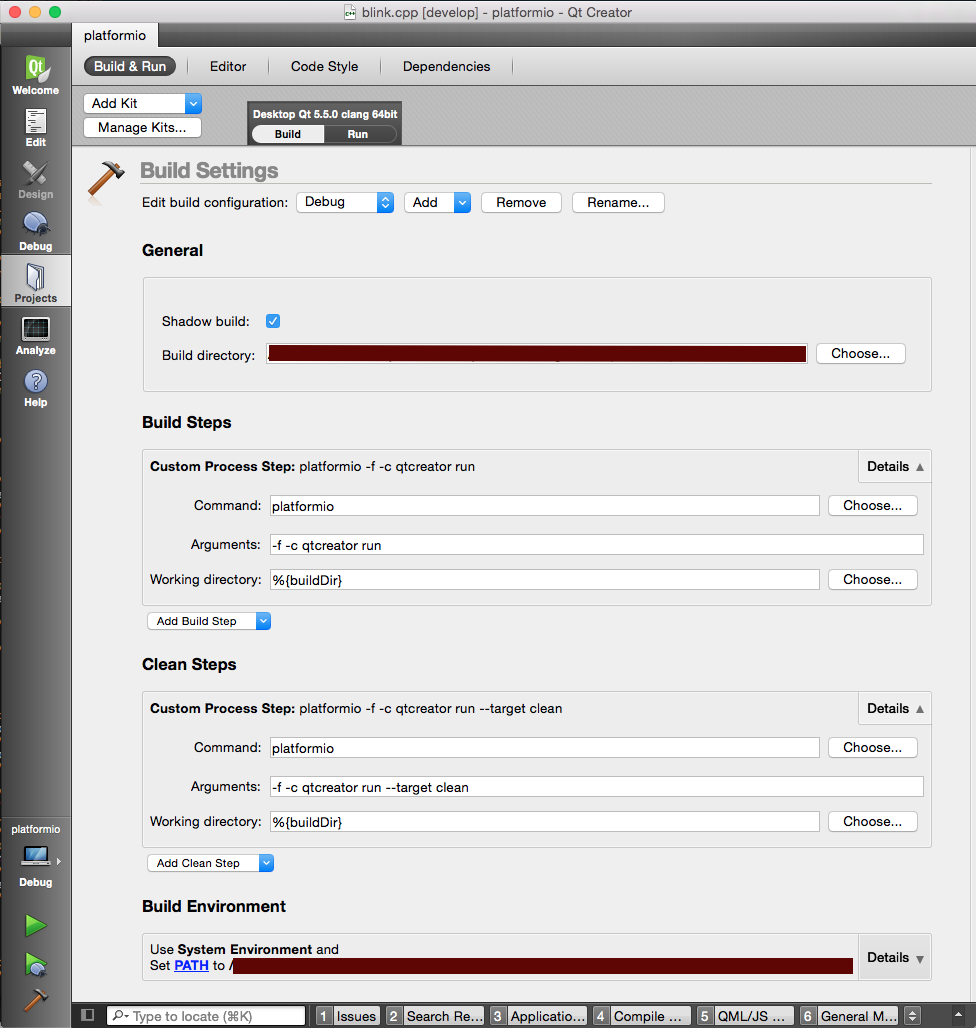
Configure Project(Projectsmode, left panel)Set
General > Build directoryto the project directory where is located “platformio.ini” (Project Configuration File)Remove all items from
Build Steps, click onBuild Steps > Add Build Step > Custom Process Stepand set:Command:
platformioArguments:
-f -c qtcreator runWorking directory:
%{buildDir}
Remove all items from
Clean Steps, click onClean Steps > Add Clean Step > Custom Process Stepand set:Command:
platformioArguments:
-f -c qtcreator run --target cleanWorking directory:
%{buildDir}
Update
PATHinBuild Environment > PATH > EDITwith the result of this command (paste in Terminal):
# Linux, Mac
echo $PATH

# Windows
echo %PATH%
Switch to
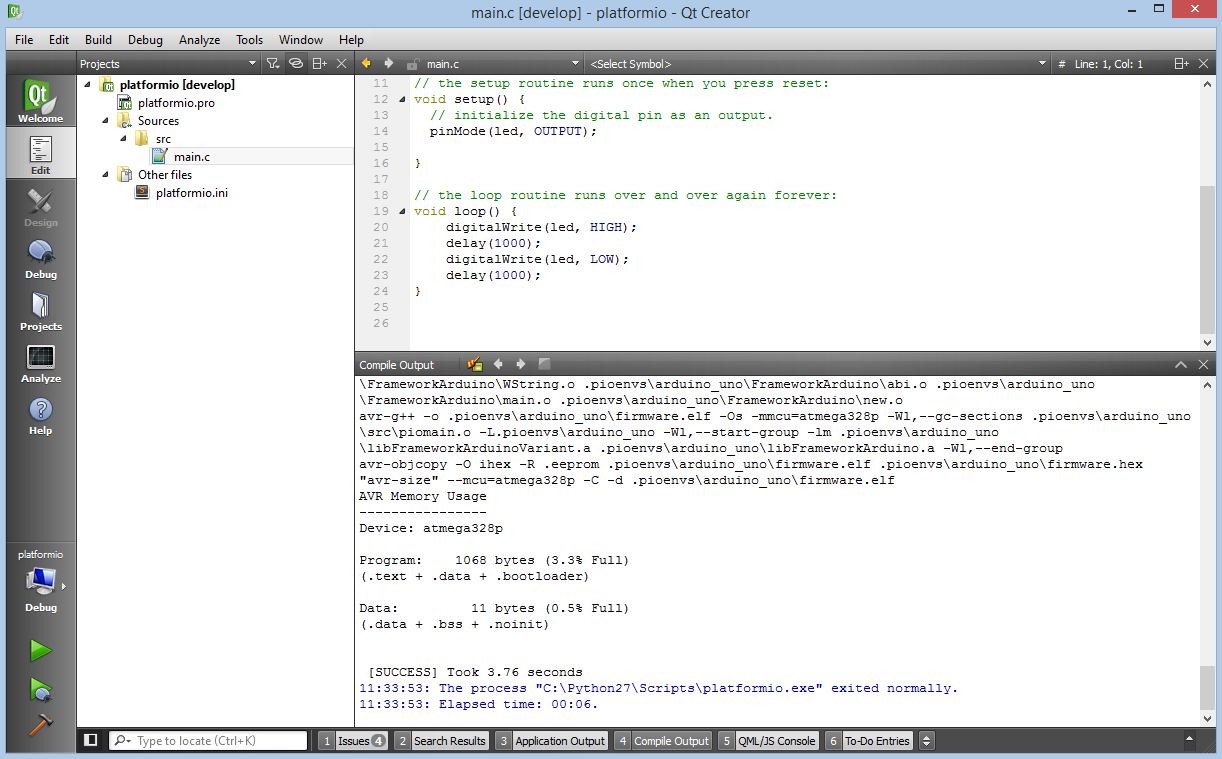
Editmode (left panel) and open source file fromsrcdirectory (*.c, *.cpp, *.ino, etc.)Build project:
Menu: Build > Build All.
Warning
The libraries which are added, installed or used in the project after generating process won’t be reflected in IDE. To fix it you need to reinitialize project using platformio init (repeat it).
Manual Integration
Setup New Project
First of all, let’s create new project from Qt Creator Start Page: New Project or using Menu: File > New File or Project, then select project with Empty Qt Project type (Other Project > Empty Qt Project), fill Name, Create in.
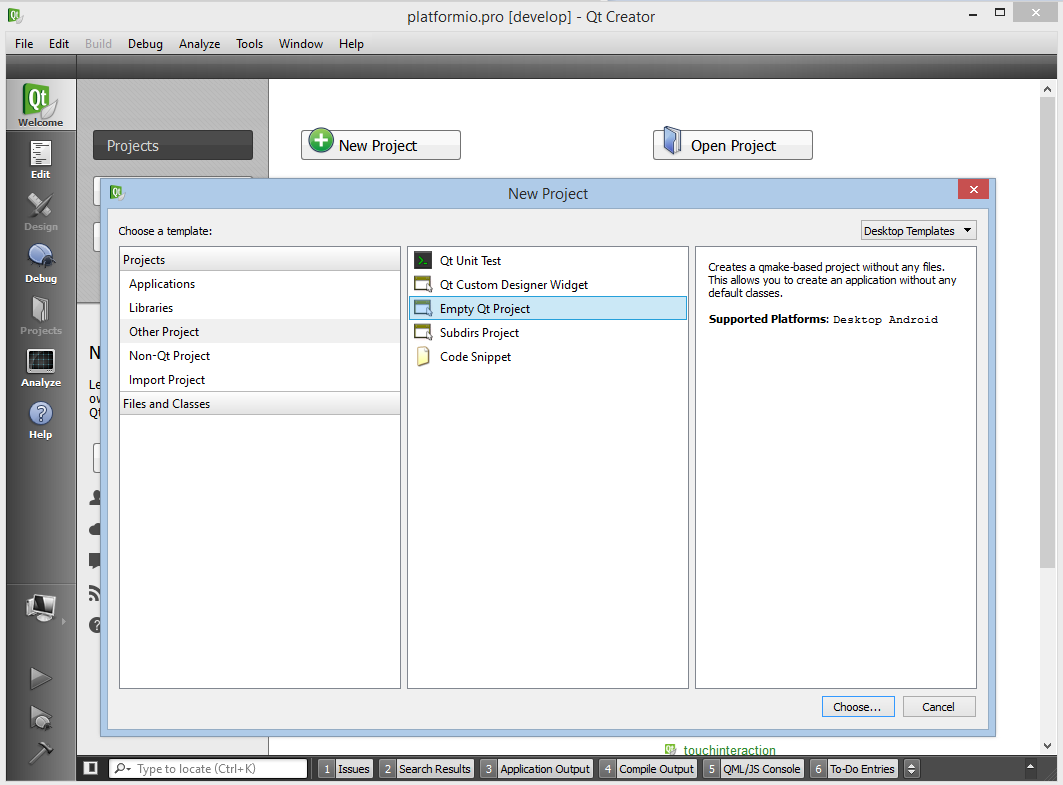
On the next steps select any available kit and click Finish button.

Secondly, we need to delete default build and clean steps and configure project with PlatformIO Build System (click on Projects label on left menu or Ctrl+5 shortcut):
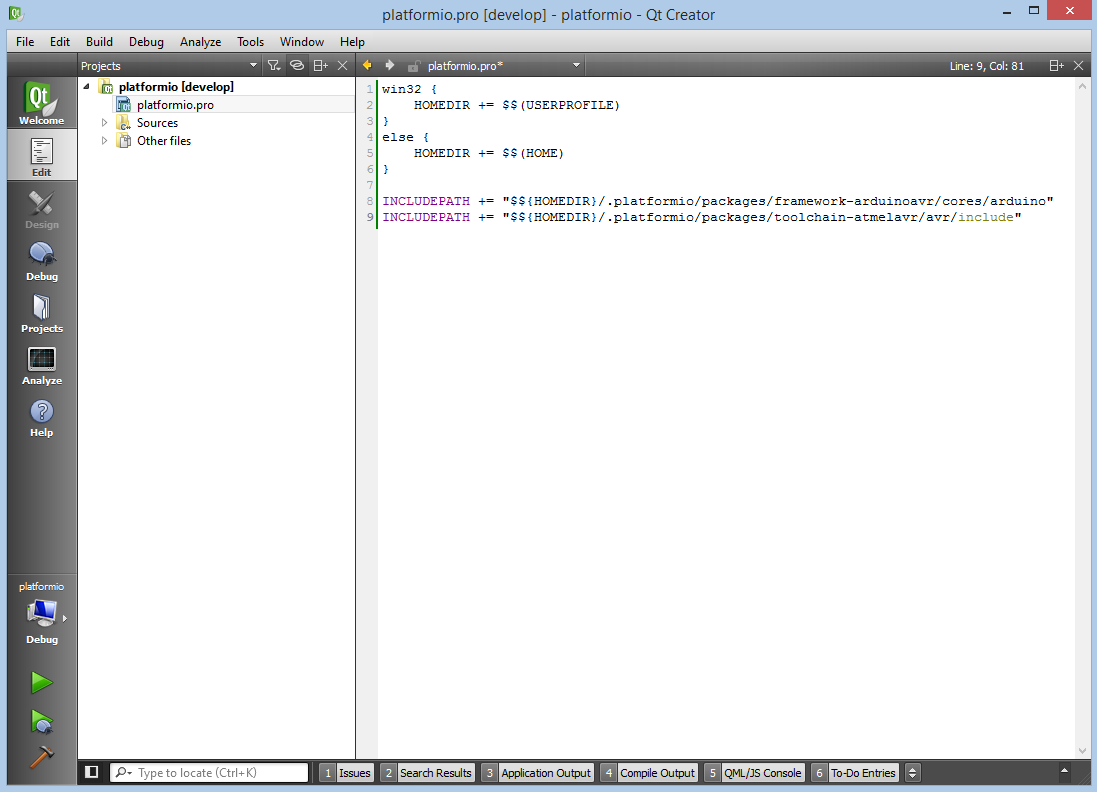
Thirdly, change project file by adding path to directories with header files. Please edit project file to match the following contents:
win32 {
    HOMEDIR += $$(USERPROFILE)
}
else {
    HOMEDIR += $$(HOME)
}

INCLUDEPATH += "$${HOMEDIR}/.platformio/packages/framework-arduinoavr/cores/arduino"
INCLUDEPATH += "$${HOMEDIR}/.platformio/packages/toolchain-atmelavr/avr/include"
First program in Qt Creator
Simple “Blink” project will consist from two files:
1. In the console, navigate to the root of your project folder and initialize platformio project with platformio init
2. The main “C” source file named main.c must be located in the src directory.
Let’s create new text file named main.c using Menu: New File or Project > General > Text File:

Copy the source code which is described below to file main.c.
#include "Arduino.h"
#define WLED    13  // Most Arduino boards already have an LED attached to pin 13 on the board itself

void setup()
{
  pinMode(WLED, OUTPUT);  // set pin as output
}

void loop()
{
  digitalWrite(WLED, HIGH);  // set the LED on
  delay(1000);               // wait for a second
  digitalWrite(WLED, LOW);   // set the LED off
  delay(1000);               // wait for a second
}
Locate the project configuration file named
platformio.iniat the root of the project directory and open it.

Edit the content to match the code described below.
; PlatformIO Project Configuration File
;
;   Build options: build flags, source filter, extra scripting
;   Upload options: custom port, speed and extra flags
;   Library options: dependencies, extra library storages
;
; Please visit documentation for the other options and examples
; https://docs.platformio.org/page/projectconf.html

[env:arduino_uno]
platform = atmelavr
framework = arduino
board = uno
Conclusion
Taking everything into account, we can build project with shortcut Ctrl+Shift+B or using Menu: Build > Build All.